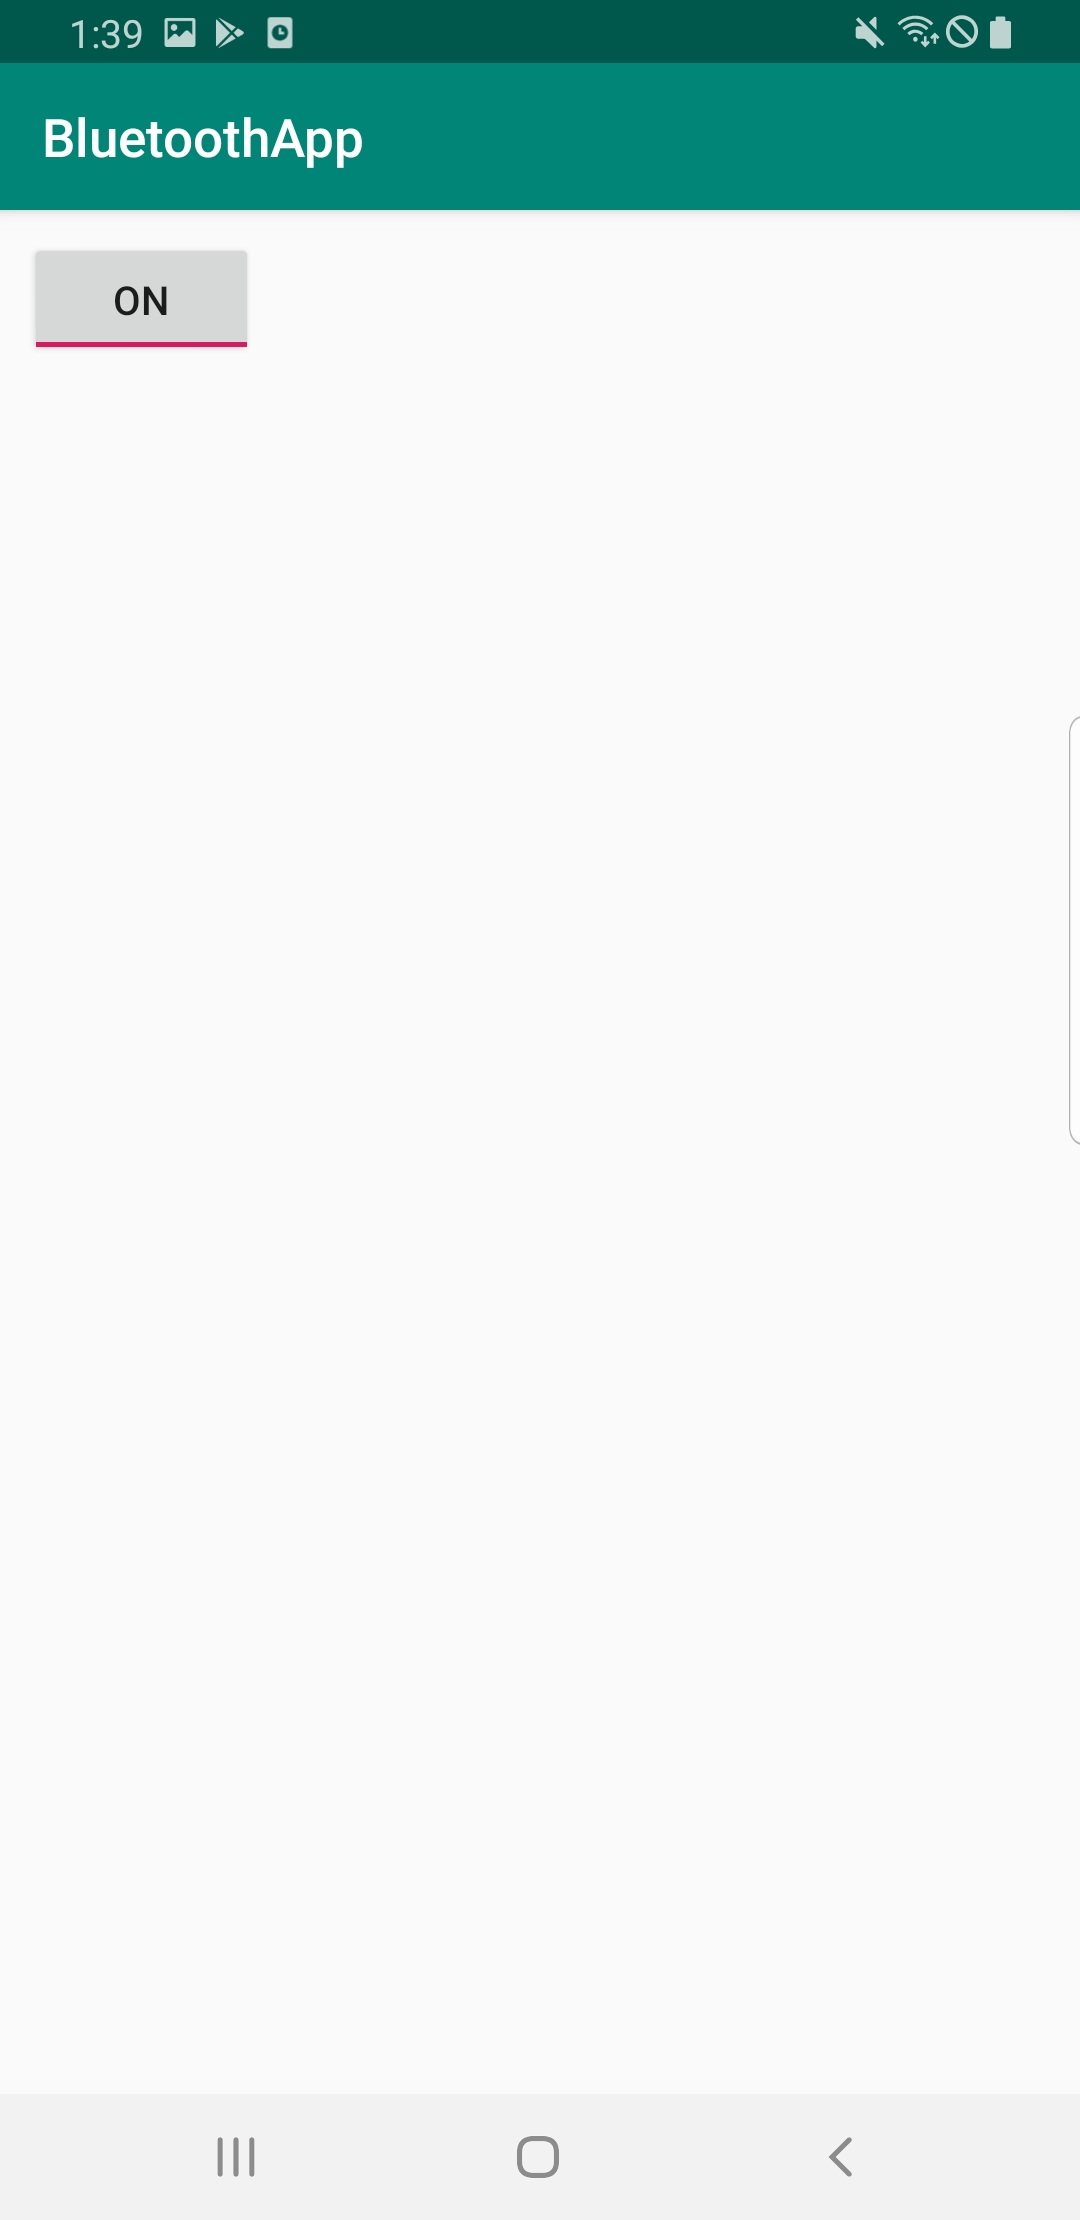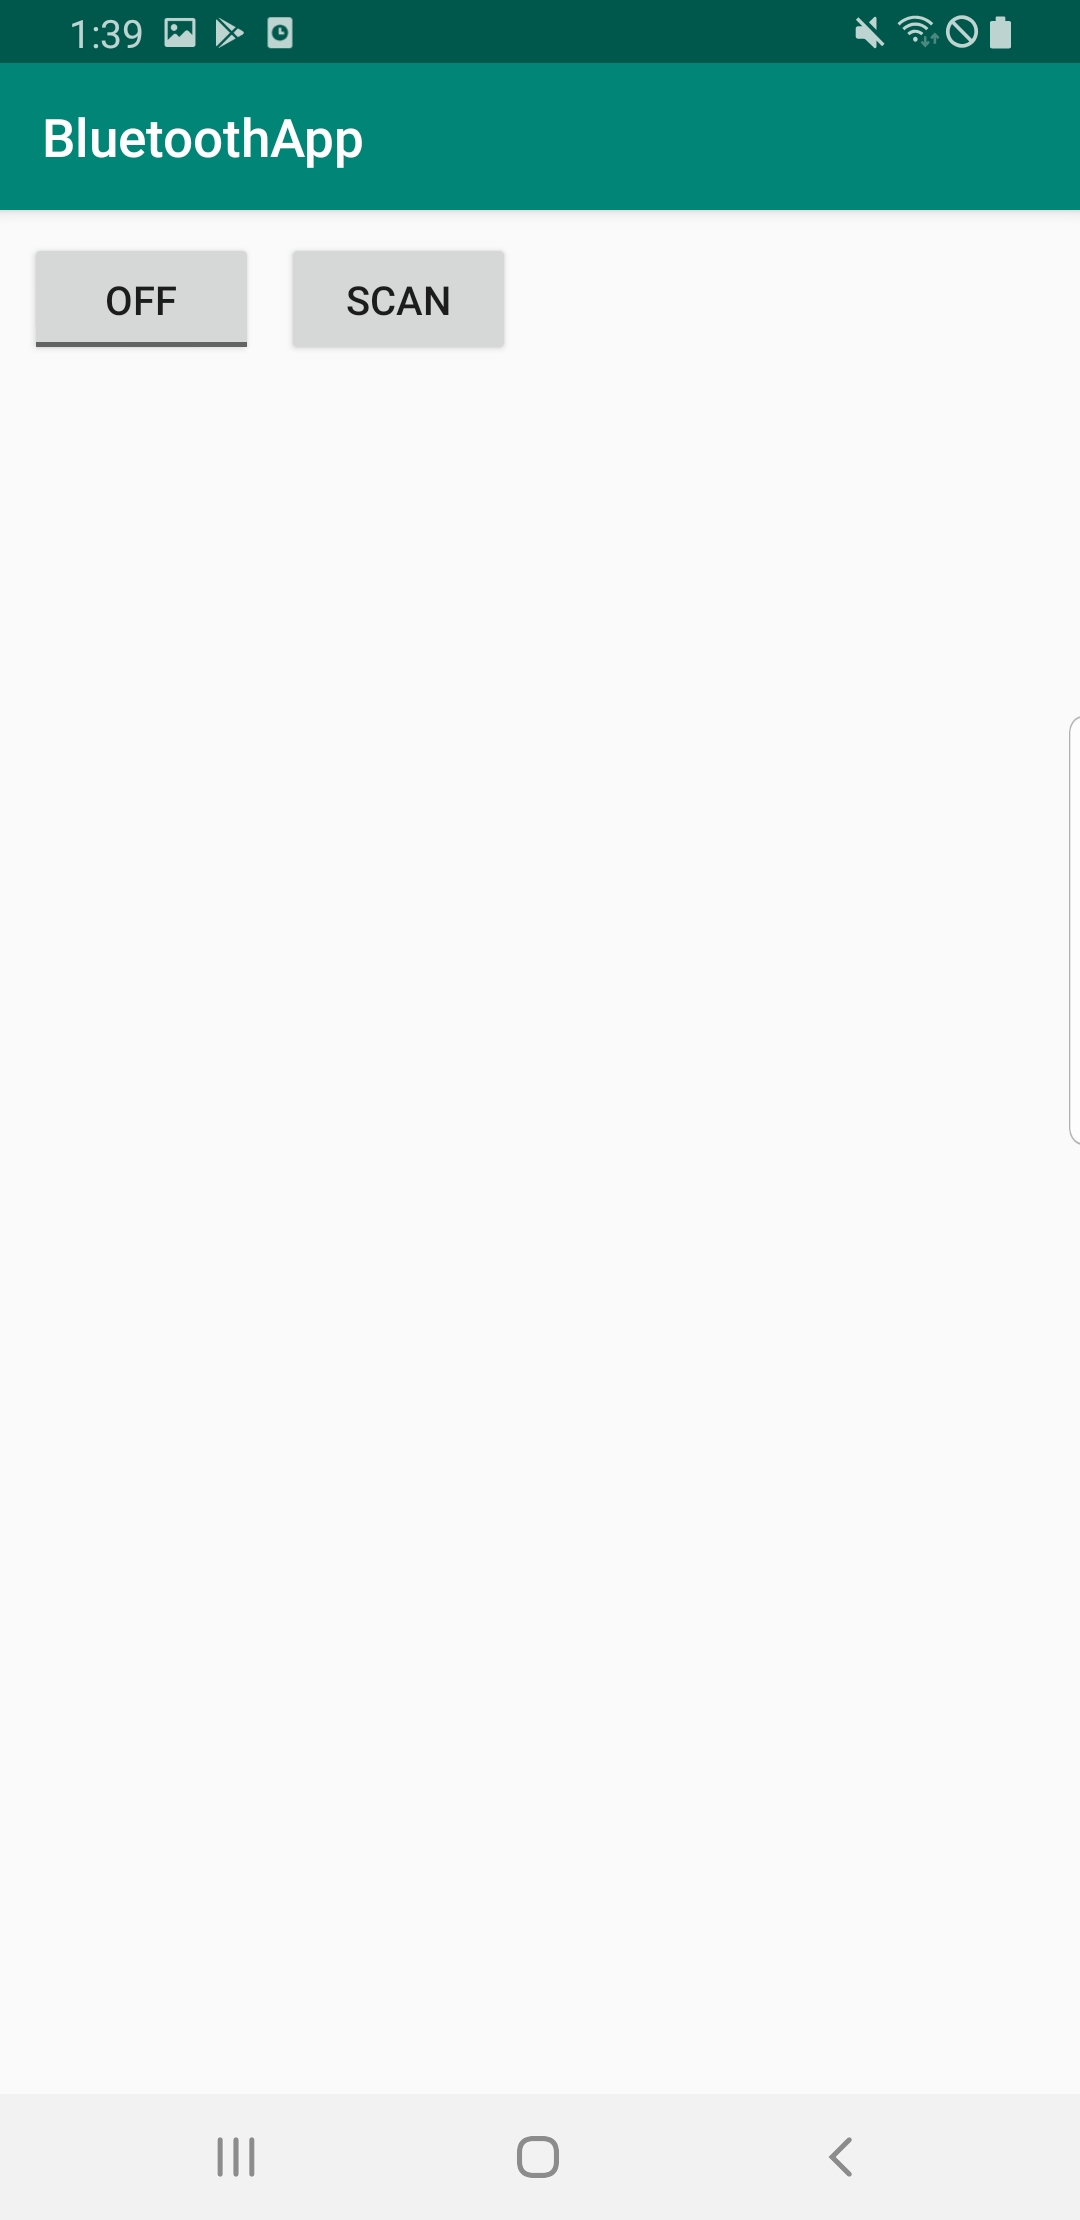


블루투스 설정 및 On/Off 제어는 이전 글 참고하기
[Kotlin] 블루투스 On/Off 제어하기
Toggle Button을 통해서 블루투스 기능을 On/Off 해보자. 1. Bluetooth 권한 등록 어플리케이션에서 블루투스 기능을 사용하려면 두 개의 권한을 선언해야 한다. BLUETOOTH는 연결 요청, 연결 수락 및 데이터
doqtqu.tistory.com
Layout Setting하기
activity_main.xml
<?xml version="1.0" encoding="utf-8"?>
<androidx.constraintlayout.widget.ConstraintLayout xmlns:android="http://schemas.android.com/apk/res/android"
    xmlns:app="http://schemas.android.com/apk/res-auto"
    xmlns:tools="http://schemas.android.com/tools"
    android:layout_width="match_parent"
    android:layout_height="match_parent"
    tools:context=".MainActivity">

    <ToggleButton
        android:id="@+id/ble_on_off_btn"
        android:layout_width="wrap_content"
        android:layout_height="wrap_content"
        android:layout_marginStart="10dp"
        android:layout_marginTop="10dp"
        android:text="Bluetooth ON/OFF"
        app:layout_constraintStart_toStartOf="parent"
        app:layout_constraintTop_toTopOf="parent" />

    <Button
        android:id="@+id/scanBtn"
        android:layout_width="wrap_content"
        android:layout_height="wrap_content"
        android:layout_marginStart="10dp"
        android:layout_marginTop="10dp"
        android:text="@string/scan_button"
        android:visibility="invisible"
        app:layout_constraintStart_toEndOf="@+id/ble_on_off_btn"
        app:layout_constraintTop_toTopOf="parent" />

    <androidx.recyclerview.widget.RecyclerView
        android:id="@+id/recyclerView"
        android:layout_width="match_parent"
        android:layout_height="wrap_content"
        android:scrollbars="vertical"
        app:layout_constraintEnd_toEndOf="parent"
        app:layout_constraintStart_toStartOf="parent"
        app:layout_constraintTop_toBottomOf="@+id/scanBtn" />

</androidx.constraintlayout.widget.ConstraintLayout>
layout > new > Layout resource file 을 통해 아래와 같은 xml을 하나 추가해준다.
아래 xml은 Bluetooth Device Scan 시 Device Name과 Address를 표기할 TextView 두 개를 담는 셀의 구조이다.
recyclerview_item.xml
<?xml version="1.0" encoding="utf-8"?>
<LinearLayout xmlns:android="http://schemas.android.com/apk/res/android"
    xmlns:app="http://schemas.android.com/apk/res-auto"
    xmlns:tools="http://schemas.android.com/tools"
    android:layout_width="match_parent"
    android:layout_height="wrap_content"
    android:orientation="horizontal"
    tools:context=".MainActivity">

    <TextView
        android:id="@+id/item_name"
        android:layout_width="wrap_content"
        android:layout_height="wrap_content"
        android:text="item_name"
        android:textAppearance="@style/TextAppearance.AppCompat.Medium"
        app:layout_constraintStart_toStartOf="parent"
        app:layout_constraintTop_toTopOf="parent" />

    <TextView
        android:id="@+id/item_address"
        android:layout_width="wrap_content"
        android:layout_height="wrap_content"
        android:text="item_address"
        android:layout_marginLeft="20dp"
        android:textAppearance="@style/TextAppearance.AppCompat.Medium"
        app:layout_constraintStart_toStartOf="parent"
        app:layout_constraintTop_toTopOf="parent" />

</LinearLayout>
Scan Button Visiblity 설정
Scan Button은 Bluetooth가 활성화 되었을 때만 보인다.
설정을 위해 onCreate 함수 안의 코드를 아래와 같이 수정한다.
scanBtn.visibility = if (scanBtn.visibility == View.VISIBLE){ View.INVISIBLE } else{ View.VISIBLE } 는 VISIBLE인 경우 INVISIBLE로 INVISIBLE의 경우 VISIBLE로 Toggle 시키는 코드이다.
val scanBtn: Button = findViewById(R.id.scanBtn)
if (bluetoothAdapter != null) {
    if (bluetoothAdapter ?. isEnabled == false) {
        bleOnOffBtn.isChecked = true
        scanBtn.isVisible = false
    } else {
        bleOnOffBtn.isChecked = false
        scanBtn.isVisible = true
    }
}
bleOnOffBtn.setOnCheckedChangeListener {
    _,
    isChecked - > bluetoothOnOff()
    scanBtn.visibility = if(scanBtn.visibility == View.VISIBLE) {
        View.INVISIBLE
    } else {
        View.VISIBLE
    }
}
Bluetooth Device Scan을 위한 Permission 확인하기
요청할 Permission을 PERMISSIONS라는 이름의 배열로 저장 후, 해당 배열에 저장된 Permission을 모두 요청한다. Bluetooth Scan 기능을 사용하려면 ACCESS_FINE_LOCATION이라는 위치 접근 Permission을 허용해줘야한다.
    private val REQUEST_PERMISSIONS= 2
    private val PERMISSIONS = arrayOf(
        Manifest.permission.ACCESS_FINE_LOCATION
    )
    ...

    private fun hasPermissions(context: Context?, permissions: Array<String>): Boolean {
        if (Build.VERSION.SDK_INT >= Build.VERSION_CODES.M && context != null && permissions != null) {
            for (permission in permissions) {
                if (ActivityCompat.checkSelfPermission(context, permission)
                    != PackageManager.PERMISSION_GRANTED) {
                    return false
                }
            }
        }
        return true
    }

    // Permission 확인
    @RequiresApi(Build.VERSION_CODES.M)
    override fun onRequestPermissionsResult(
        requestCode: Int,
        permissions: Array<String?>,
        grantResults: IntArray
    ) {
        when (requestCode) {
            REQUEST_PERMISSIONS -> {
                // If request is cancelled, the result arrays are empty.
                if (grantResults.isNotEmpty() && grantResults[0] == PackageManager.PERMISSION_GRANTED) {
                    Toast.makeText(this, "Permissions granted!", Toast.LENGTH_SHORT).show()
                } else {
                    requestPermissions(permissions, REQUEST_PERMISSIONS)
                    Toast.makeText(this, "Permissions must be granted", Toast.LENGTH_SHORT).show()
                }
            }
        }
    }
Bluetooth Device Scan하기
Class 내부 전역변수로 아래 4줄을 추가한다.
- scanning : scan중인지 나타내는 state 변수
- devicesArr : scan한 Device를 담는 배열
- SCAN_PERIOD
- handler
private var scanning: Boolean = false
private var devicesArr = ArrayList<BluetoothDevice>()
private val SCAN_PERIOD = 1000
private val handler = Handler()
mLeScanCallback이라는 이름의 ScanCallback 변수를 만든다.
ScanCallback은 scan에 실패하였을 때 실행되는 OnScanFailed()와 Batch Scan Result가 전달될 때 콜백하는 onBatchScanResults(), BLE advertisement가 발견되었을 때 실행되는 onScanResult()를 override 한다.
아래와 같이 onBatchScanResults()와 onScanResult()의 경우, Scan된 Device의 Name이 null이 아니면 deviceArr 배열에 추가하는 코드를 추가한다. recyclerViewAdapter.notifyDataSetChanged()는 다음 과정에서 설명하도록 한다.
private val mLeScanCallback = @RequiresApi(Build.VERSION_CODES.LOLLIPOP)
object:ScanCallback() {
    override fun onScanFailed(errorCode: Int) {
        super.onScanFailed(errorCode)
        Log.d("scanCallback", "BLE Scan Failed : " + errorCode)
    }
    override fun onBatchScanResults(results: MutableList<ScanResult > ?) {
        super.onBatchScanResults(results)
        results?.let {
            // results is not null
            for(result in it) {
                if(!devicesArr.contains(result.device) && result.device.name!=null) devicesArr.add(result.device)
            }
        }
    }
    override fun onScanResult(callbackType: Int, result: ScanResult?) {
        super.onScanResult(callbackType, result)
        result?.let {
            // result is not null
            if(!devicesArr.contains(it.device) && it.device.name!=null) devicesArr.add(it.device)
            recyclerViewAdapter.notifyDataSetChanged()
        }
    }
}
scanDevice라는 함수를 통해서 매개변수 state가 true이면 handler를 이용해 Bluetooth Scan을 SCAN_PERIOD 동안 실행하고 false이면, Scanning을 멈춘다.
@RequiresApi(Build.VERSION_CODES.LOLLIPOP)
private fun scanDevice(state:Boolean) = if(state) {
    handler.postDelayed({
        scanning = false
        bluetoothAdapter?.bluetoothLeScanner?.stopScan(mLeScanCallback)
        }, SCAN_PERIOD)
        scanning = true
        devicesArr.clear()
        bluetoothAdapter?.bluetoothLeScanner?.startScan(mLeScanCallback)
}
else {
    scanning = false
    bluetoothAdapter?.bluetoothLeScanner?.stopScan(mLeScanCallback)
}
scanBtn을 누르면, 위의 과정에서 추가했던 Permission 검사 함수를 통해 필요 Permission을 요청한 후, ScanDevice(true)를 통해 Bluetooth Device Scan을 실행한다.
scanBtn.setOnClickListener {
    v:View? ->// Scan Button Onclick
    if(!hasPermissions(this, PERMISSIONS)) {
        requestPermissions(PERMISSIONS, REQUEST_ALL_PERMISSION)
    }
    scanDevice(true)
}
RecyclerView를 통해 스캔한 기기 리스트 보여주기
Class 내부 전역변수로 아래 2줄을 추가한다.
private lateinit var viewManager: RecyclerView.LayoutManager
private lateinit var recyclerViewAdapter : RecyclerViewAdapter
onCreate 내부에 아래의 코드를 통해 recyclerView를 초기화한다.
viewManager = LinearLayoutManager(this)
recyclerViewAdapter = RecyclerViewAdapter(devicesArr)
val recyclerView = findViewById<RecyclerView > (R.id.recyclerView).apply {
    layoutManager = viewManager
    adapter = recyclerViewAdapter
}
RecyclerViewAdapter는 다음과 같이 devicesArr 배열의 Name, Address 정보를 recyclerview_item.xml의 두 TextView의 data로 동적 Cell을 생성한다.
class RecyclerViewAdapter(private val myDataset: ArrayList<BluetoothDevice>):
   RecyclerView.Adapter<RecyclerViewAdapter.MyViewHolder > () {
      class MyViewHolder(val linearView: LinearLayout):RecyclerView.ViewHolder(linearView)
      override fun onCreateViewHolder(parent: ViewGroup,
          viewType: Int):RecyclerViewAdapter.MyViewHolder {
          // create a new view
          val linearView = LayoutInflater.from(parent.context)
              .inflate(R.layout.recyclerview_item, parent, false) as LinearLayout
          return MyViewHolder(linearView)
      }

      override fun onBindViewHolder(holder: MyViewHolder, position: Int) {
          val itemName: TextView = holder.linearView.findViewById(R.id.item_name)
          val itemAddress: TextView = holder.linearView.findViewById(R.id.item_address)
          itemName.text = myDataset[position].name
          itemAddress.text = myDataset[position].address
      }
      override fun getItemCount() = myDataset.size
   }
}
전체 소스코드
package com.example.bluetoothapp

import android.Manifest
import android.annotation.TargetApi
import android.bluetooth.BluetoothAdapter
import android.bluetooth.BluetoothDevice
import android.bluetooth.le.ScanCallback
import android.bluetooth.le.ScanResult
import android.content.Context
import android.content.Intent
import android.content.pm.PackageManager
import android.os.Build
import androidx.appcompat.app.AppCompatActivity
import android.os.Bundle
import android.os.Handler
import android.util.Log
import android.view.LayoutInflater
import android.view.View
import android.view.ViewGroup
import android.widget.*
import androidx.annotation.RequiresApi
import androidx.core.app.ActivityCompat
import androidx.core.view.isVisible
import androidx.recyclerview.widget.LinearLayoutManager
import androidx.recyclerview.widget.RecyclerView

class MainActivity : AppCompatActivity() {
    private val REQUEST_ENABLE_BT=1
    private val REQUEST_ALL_PERMISSION= 2
    private val PERMISSIONS = arrayOf(
        Manifest.permission.ACCESS_FINE_LOCATION
    )
    private var bluetoothAdapter: BluetoothAdapter? = null
    private var scanning: Boolean = false
    private var devicesArr = ArrayList<BluetoothDevice>()
    private val SCAN_PERIOD = 1000
    private val handler = Handler()
    private lateinit var viewManager: RecyclerView.LayoutManager
    private lateinit var recyclerViewAdapter : RecyclerViewAdapter
    private val mLeScanCallback = @RequiresApi(Build.VERSION_CODES.LOLLIPOP)
    object : ScanCallback() {
        override fun onScanFailed(errorCode: Int) {
            super.onScanFailed(errorCode)
            Log.d("scanCallback", "BLE Scan Failed : " + errorCode)
        }

        override fun onBatchScanResults(results: MutableList<ScanResult>?) {
            super.onBatchScanResults(results)
            results?.let{
                // results is not null
                for (result in it){
                    if (!devicesArr.contains(result.device) && result.device.name!=null) devicesArr.add(result.device)
                }

            }
        }

        override fun onScanResult(callbackType: Int, result: ScanResult?) {
            super.onScanResult(callbackType, result)
            result?.let {
                // result is not null
                if (!devicesArr.contains(it.device) && it.device.name!=null) devicesArr.add(it.device)
                recyclerViewAdapter.notifyDataSetChanged()
            }
        }

    }
    @RequiresApi(Build.VERSION_CODES.LOLLIPOP)
    private fun scanDevice(state:Boolean) = if(state){
        handler.postDelayed({
            scanning = false
            bluetoothAdapter?.bluetoothLeScanner?.stopScan(mLeScanCallback)
        }, SCAN_PERIOD)
        scanning = true
        devicesArr.clear()
        bluetoothAdapter?.bluetoothLeScanner?.startScan(mLeScanCallback)
    }else{
        scanning = false
        bluetoothAdapter?.bluetoothLeScanner?.stopScan(mLeScanCallback)
    }

    private fun hasPermissions(context: Context?, permissions: Array<String>): Boolean {
        if (Build.VERSION.SDK_INT >= Build.VERSION_CODES.M && context != null && permissions != null) {
            for (permission in permissions) {
                if (ActivityCompat.checkSelfPermission(context, permission)
                    != PackageManager.PERMISSION_GRANTED) {
                    return false
                }
            }
        }
        return true
    }
    // Permission check
    @RequiresApi(Build.VERSION_CODES.M)
    override fun onRequestPermissionsResult(
        requestCode: Int,
        permissions: Array<String?>,
        grantResults: IntArray
    ) {
        when (requestCode) {
            REQUEST_ALL_PERMISSION -> {
                // If request is cancelled, the result arrays are empty.
                if (grantResults.isNotEmpty() && grantResults[0] == PackageManager.PERMISSION_GRANTED) {
                    Toast.makeText(this, "Permissions granted!", Toast.LENGTH_SHORT).show()
                } else {
                    requestPermissions(permissions, REQUEST_ALL_PERMISSION)
                    Toast.makeText(this, "Permissions must be granted", Toast.LENGTH_SHORT).show()
                }
            }
        }
    }
    @TargetApi(Build.VERSION_CODES.M)
    @RequiresApi(Build.VERSION_CODES.LOLLIPOP)
    override fun onCreate(savedInstanceState: Bundle?) {
        super.onCreate(savedInstanceState)
        setContentView(R.layout.activity_main)
        val bleOnOffBtn:ToggleButton = findViewById(R.id.ble_on_off_btn)
        val scanBtn: Button = findViewById(R.id.scanBtn)
        bluetoothAdapter = BluetoothAdapter.getDefaultAdapter()
        viewManager = LinearLayoutManager(this)
        recyclerViewAdapter =  RecyclerViewAdapter(devicesArr)
        val recyclerView = findViewById<RecyclerView>(R.id.recyclerView).apply {
            layoutManager = viewManager
            adapter = recyclerViewAdapter
        }

        if(bluetoothAdapter!=null){
            if(bluetoothAdapter?.isEnabled==false){
                bleOnOffBtn.isChecked = true
                scanBtn.isVisible = false
            } else{
                bleOnOffBtn.isChecked = false
                scanBtn.isVisible = true
            }
        }

        bleOnOffBtn.setOnCheckedChangeListener { _, isChecked ->
            bluetoothOnOff()
            scanBtn.visibility = if (scanBtn.visibility == View.VISIBLE){ View.INVISIBLE } else{ View.VISIBLE }
        }

        scanBtn.setOnClickListener { v:View? -> // Scan Button Onclick
            if (!hasPermissions(this, PERMISSIONS)) {
                requestPermissions(PERMISSIONS, REQUEST_ALL_PERMISSION)
            }
            scanDevice(true)
        }
    }
    fun bluetoothOnOff(){
        if (bluetoothAdapter == null) {
            // Device doesn't support Bluetooth
            Log.d("bluetoothAdapter","Device doesn't support Bluetooth")
        }else{
            if (bluetoothAdapter?.isEnabled == false) { // 블루투스 꺼져 있으면 블루투스 활성화
                val enableBtIntent = Intent(BluetoothAdapter.ACTION_REQUEST_ENABLE)
                startActivityForResult(enableBtIntent, REQUEST_ENABLE_BT)
            } else{ // 블루투스 켜져있으면 블루투스 비활성화
                bluetoothAdapter?.disable()
            }
        }
    }
    class RecyclerViewAdapter(private val myDataset: ArrayList<BluetoothDevice>) :
        RecyclerView.Adapter<RecyclerViewAdapter.MyViewHolder>() {

        class MyViewHolder(val linearView: LinearLayout) : RecyclerView.ViewHolder(linearView)

        override fun onCreateViewHolder(parent: ViewGroup,
                                        viewType: Int): RecyclerViewAdapter.MyViewHolder {
            // create a new view
            val linearView = LayoutInflater.from(parent.context)
                .inflate(R.layout.recyclerview_item, parent, false) as LinearLayout
            return MyViewHolder(linearView)
        }

        // Replace the contents of a view (invoked by the layout manager)
        override fun onBindViewHolder(holder: MyViewHolder, position: Int) {
            val itemName:TextView = holder.linearView.findViewById(R.id.item_name)
            val itemAddress:TextView = holder.linearView.findViewById(R.id.item_address)
            itemName.text = myDataset[position].name
            itemAddress.text = myDataset[position].address
        }

        override fun getItemCount() = myDataset.size
    }
}

private fun Handler.postDelayed(function: () -> Unit?, scanPeriod: Int) {

}
참고한 게시글
[안드로이드 Kotlin] BLE(Bluetooth Low Energy) 통신 예제
전체적으로 BLE 기능 구현을 심플하게 작성하였습니다. UI 업데이트 부분은, 데이터 바인딩을 사용하였습니다. BLE 기능구현 위주로 봐주세요. Permission BLE사용을 위해 위 세개의 퍼미션을 AndroidMani
ddangeun.tistory.com
'Mobile Programming > Android' 카테고리의 다른 글
| [Kotlin] 음악 재생 어플리케이션 만들기(프로그래머스 과제) (2) | 2021.04.16 |
|---|---|
| [Kotlin] BLE 기기 연결하기 (7) | 2021.01.06 |
| [Kotlin] 블루투스 On/Off 제어하기 (0) | 2020.12.21 |
| [Kotlin] 페이스북 로그인 이용하기 (2020.08) (0) | 2020.08.26 |
| [Kotlin] 구글 로그인 이용하기 (2020.08) (4) | 2020.08.24 |


댓글